1 Day Hakodate-Onuma Park Itinerary (What to see, do and eat while in Hakodate, Hokkaido)
Onuma Park is one of the must sees on every itinerary for Hakodate. Other than a short statement that Onuma Park can be done as a day trip or as a short stopover, most guides are silent as to the actual logistics and also the actual time you will likely spend in Onuma Park. This makes any planning difficult other than to block off an entire day just for Onuma Park. I hope my itinerary guide will help in your itinerary planning and make Onuma Park more accessible for all.
This guide is in two parts.
The first half is my 1 day experience/itinerary visiting landmark attractions in both Hakodate and Onuma.
The second half covers some FAQ (what I think most tourists would ask when planning their trip to Onuma).
Breakfast – Hakodate
Hakodate was one of the first few ports in Japan that opened up to the West. Being a port city, it has its own fish markets selling fresh seafood. While there are a few markets scattered around Hakodate, the Morning Market is the most accessible being located right beside Hakodate Station.
This market is a perfect spot for a traveller to grab a seafood bowl (Kaisen don) in Hakodate. For the uninitiated, this is a bowl of rice served with loads of seafood on top. A few must tries include sea urchin and crab being the signature produce of Hokkaido.
Feel free to walk around the market but don’t be pressured into entering the shops/restaurants. One thing I noticed is that the shops along the main fish market area are devoid of locals. Hint: That must mean something.
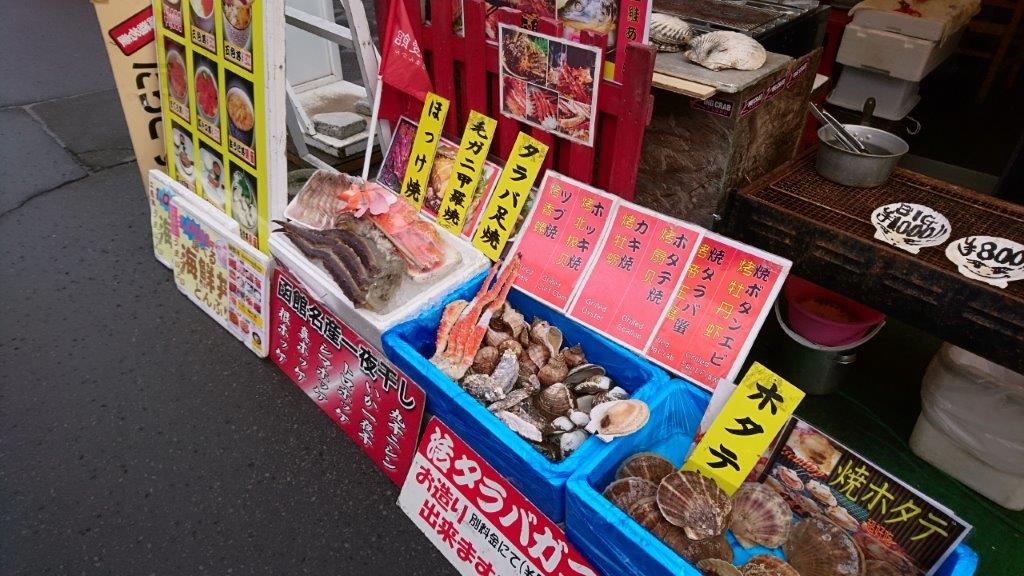
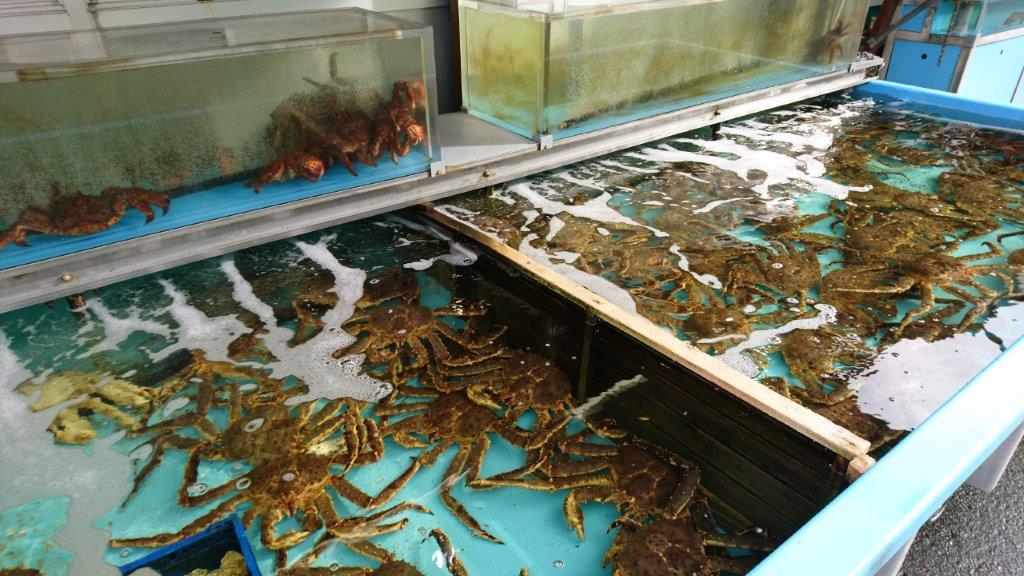


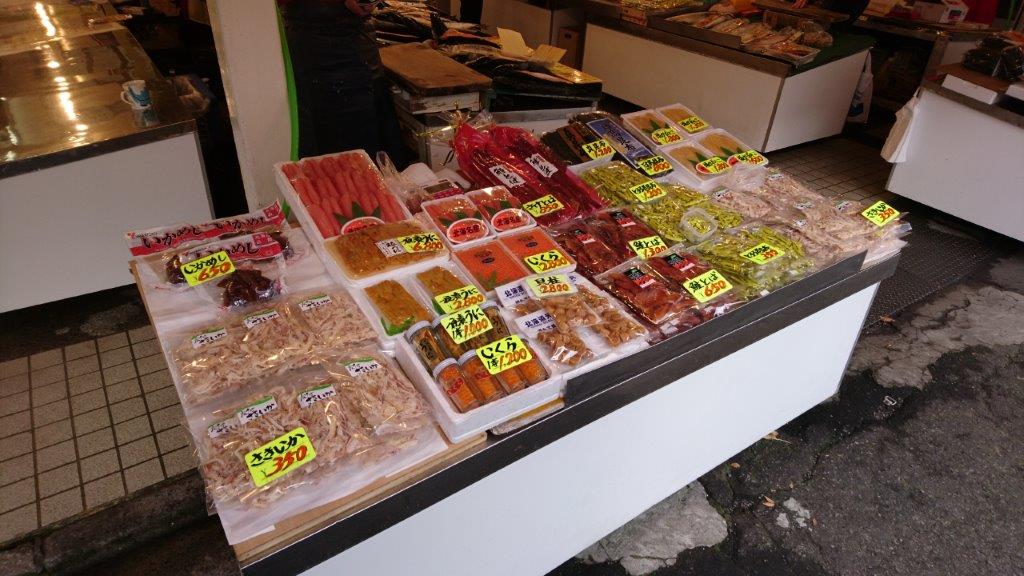

We had two breakfasts there on two separate days. The first time round, we decided to pop into one of the shops along the main market area (i.e. One along the street).
The prices looked affordable at 1,000 yen for a bowl with two types of seafood and 1,500 for three types. We also ordered grilled shellfish: An oyster and also a surf clam (total 1,600 yen).
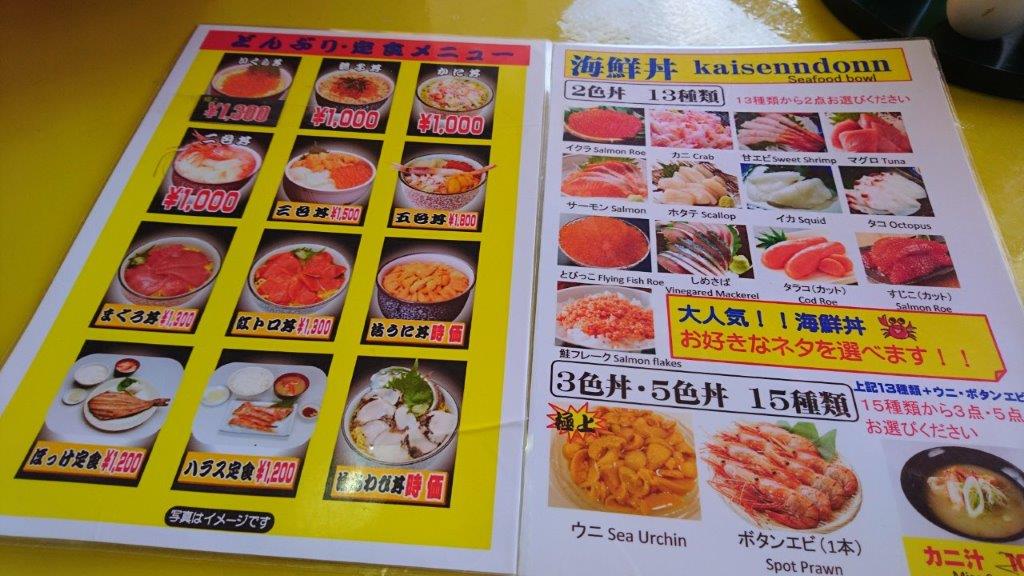
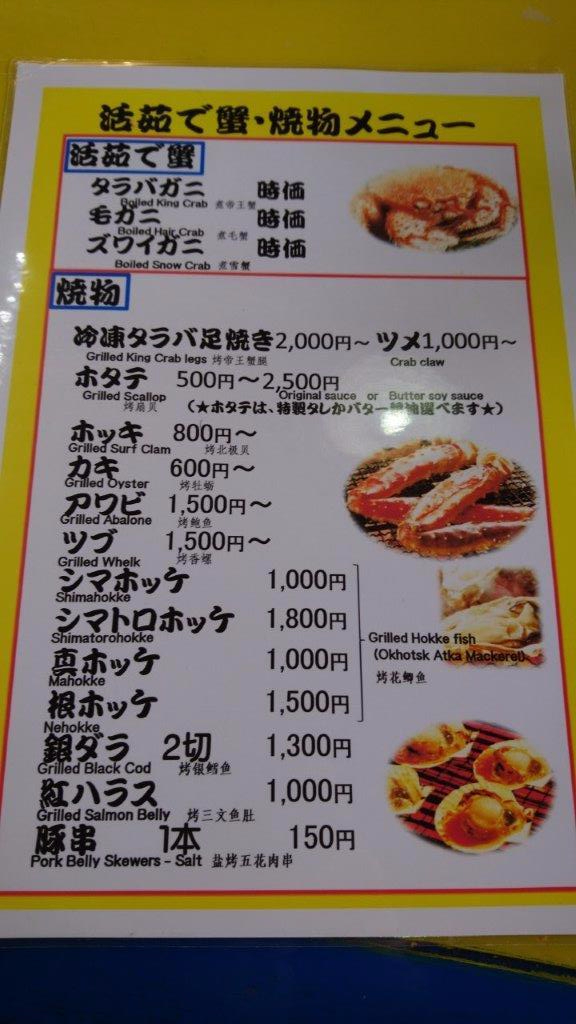
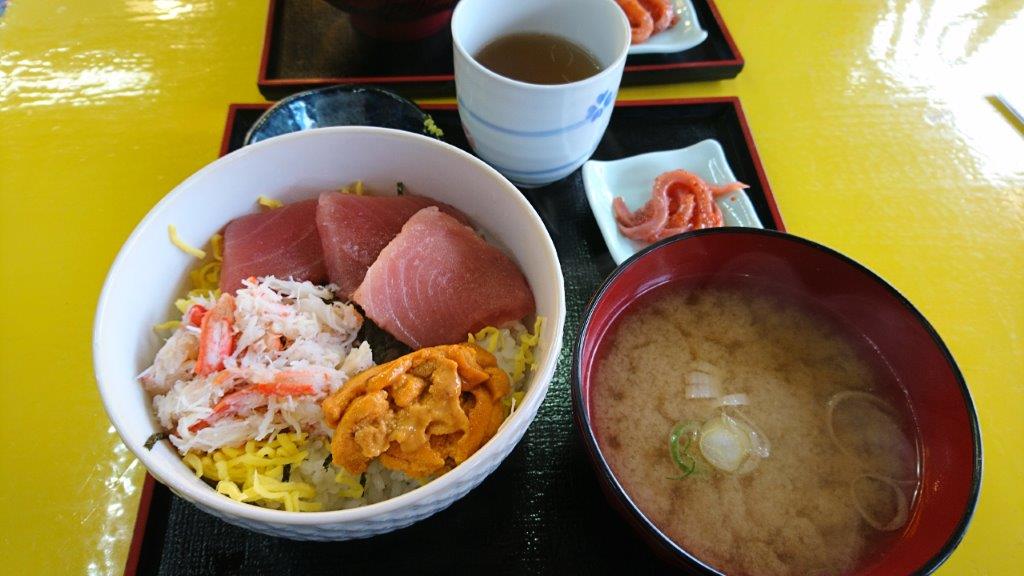
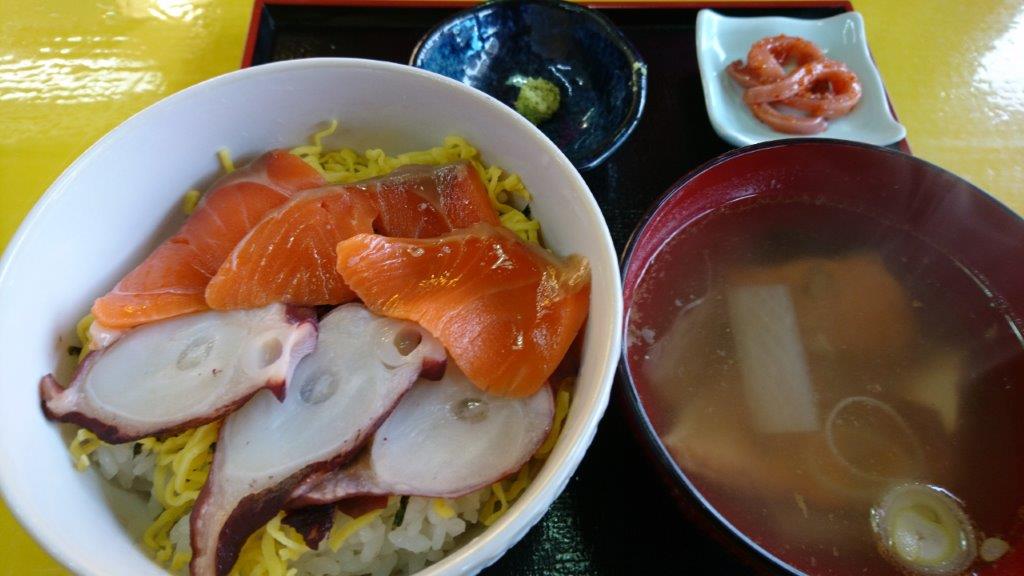
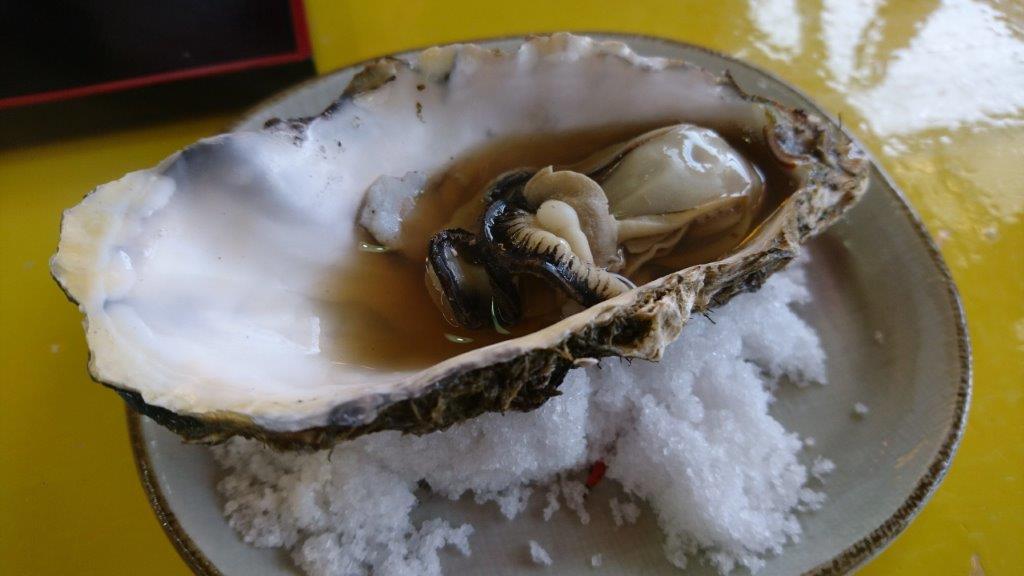
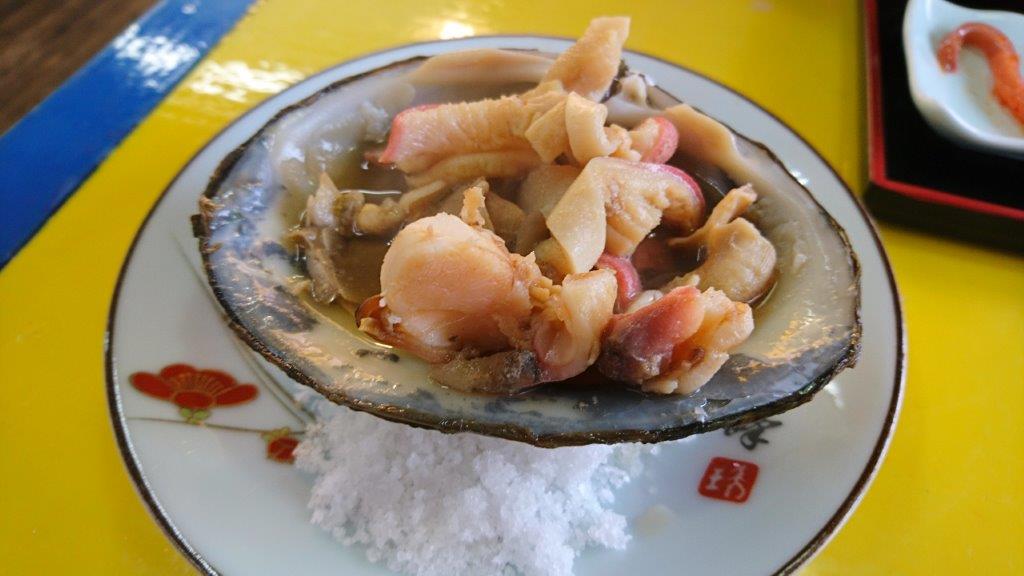
Somehow, the food was just so-so. Girlfriend was disappointed. Although the pricing was reasonable (if you ignore the 1,600 yen we spent on the shellfish), the overall portion/food display wasn’t the best and/or value for money.
Note to self and all readers: if traveling on a budget, be sure to check out the prices of different stalls. The prices tend to vary and also the serving portions (although the latter is harder to gauge until you are served the actual bowl)
During our visit the next morning, we went to a different area that is just slightly off the main market street. The place is located inside a mall/plaza that is directly opposite from Hakodate station.

Inside the mall/plaza there is a whole row of small shops selling what appears to us as being a variant of the same thing (different combinations of Kaisen dons). Being essentially the same, there is nothing much to distinguish the shops by other than the human traffic flow. We randomly (well sort of, having eliminated the stalls at both ends and just settled with the stalls in the middle) picked one stall that looked busy. Upon entering the stall, we were pleased with what we saw. Unlike our experience the previous morning, this stall was packed and you see locals having their breakfast there.


Although the food was slightly more expensive averaging 2500 yen plus per person, the overall quality and presentation was way better. We also threw in a plate of salmon sashimi. The sashimi is firmer than those we get back home in Singapore. Fresher?
While you roam the area, be sure to buy yourself a slice of the Hokkaido melon. Although we didn’t know it then, the prices in Hakodate are one of the cheapest (@200-300 yen per slice) when you compare with places like Sapporo and Otaru (@500 yen per slice).


Once you are done with breakfast, head over to Hakodate Station. If you don’t have a JR pass (click here to read more about my experience using the pass), buy yourself a ticket to Onumakoen Station. If you already have JR pass, you can head over to the same ticket counter and ask to reserve seats for the next train headed that way. As to train timings, you can either get a brochure/ask at the station or you can check online at hyperdia. As mentioned in my earlier post, I found hyperdia timings to be reliable. I covered the basics on using hyperdia here.
Hakodate to Onuma Park

Getting there
The ride takes approximately 30 mins.


Once you get out of the station, head over to the tourist center and get yourself a map of the area. Although not essential (the trails in the park are marked with direction markers at important intersections), having a map is helpful to get your bearings at the initial stage. Follow the road to a bus parking area. The path to the park is on the right side of the parking area.

Onuma Park walking trails (Part 1)
Once you reach the main plaza area, there are a few options available. You can take a boat ride around the lake, you can rent a bicycle and cycle around or you can attempt the walking trails.
My suggestion is you stick to the trails while in Onuma Park. Why? Bicycles are not allowed on the trails. You will be forced to go along the main roads. Unless you have trouble walking, the boats I feel may be restrictive. You can’t just stop and take in the view or try to get the perfect shot. If my memory serves me right, it will cost you a 1,000 yen for a 30 mins ride. Just stick with the trails!
There are essentially two main paths you can take. A small loop on the right that will bring you to the monument of a thousand winds and a big loop that will see you island hopping. Both loops are recommended as each offer different views of the park.
We did the small loop first (surprisingly by mistake having mistaken the bridge crossing as the one leading to the big loop). Be sure to look out for the spot by the shore that offers a great photo taking opportunity.


Once we were done, we headed to the correct bridge leading to the big loop. A pretty decent photo spot just before crossing the bridge and a random shot of a raven taking flight:


Upon crossing the bridge, you will be greeted with a sign at the intersection. You can either go left or right (this is a loop and either way will see you finish at this same spot). Go right. The views are better with the wide open surfaces overlooking the lake.


While it looks far on the map, the actual distance is quite walkable. It will take you around 50 mins with multiple stops to get to the default rest stop along the trail.
Lunch at Table de Rivage

The restaurant is located in the park itself and its location is ideal for visitors to stop for lunch. The restaurant offers set lunches varying from 1,600 plus yen to 2,000 plus yen.
The main difference other than the main course is the salad offered as part of the more expensive set. The sets also come with a small bowl of mushroom soup which was pretty good.


Speaking of the main courses on offer, Table de Rivage often appears on suggested itineraries because of one particular ingredient prepared and served in the restaurant: Onuma Beef. The restaurant does offer Onuma Beef on its lunch menus. If you ordered the cheaper set, you will be served roast beef. The more expensive set comes with beef stew or a hamburger steak.
We ordered the roast beef and also the beef stew to share.
You may ask which is better.
Personally, both dishes appear average to me for specific reasons.
For the roast beef, don’t expect sirloin quality steaks. Its a roast beef! While the butcher/chef tried to salvage the meat by cutting against the grain (i.e. cutting across the meat fibres) and making the meat easier to chew, it was still slightly too tough for my liking. The sauce provided, however, complements the dish and adds more flavour while you chew.

For the stew, the serving we got had a good proportion of meat and fat. The fat is crucial for the dish as the meat is very lean. Don’t get me wrong, the meat breaks up just by pressing on it with a fork and is tender. It just doesn’t have the fat to make it work. So, my suggestion, is to ration out the fatty chunks to tide you across your whole plate. One subjective comment here is the gravy, my girlfriend didn’t like the gravy. I suspect this depends on the individual. I personally felt it was okay but not mind blowing.

We finished off the meal with a cup of coffee.

Onuma Park walking trails (Part 2)
Lunch completed and with bellies full, we headed back out to finish what we started. The walk back was completely different from the walk earlier. Instead of the views of the wide open lake, the paths now bring you through wooded area. This offers a big contrast to the views earlier.


I think you will now get what I meant when I said to take the right side of the loop first. If you had gone left of the loop, I think it would be a downer to just see wooded areas since the main highlight of this walk is the lake and the views by the lake.
Onuma Park to Hakodate
We checked the train schedules and made our way back to the train station. Either refer to the pamphlet you took from Hakodate station or just check by Hyperdia for the next train coming into the station. Again, you can either make a reservation with the ticket counter (if you are travelling using the JR pass) or just risk it by going to the unreserved section of the train. For this trip, we just went with the unreserved seats.
Depending on the time of day you get back to Hakodate and also the month you travelling in, your itinerary can vary. Obviously, more daylight hours during summer offers a longer day to cover more things. For us, as we were travelling during the onset of winter, night comes in pretty fast.
One suggested itinerary can include visiting the Bay Area in Hakodate, Motomachi and then taking the ropeway up Mount Hakodate for the night view of Hakodate.
You may have to shuffle this around a bit depending on your objectives. For instance, if you intend to do some shopping at the Bay Area, it may not be as practical to carry your shopping bags up to the Mountain. So be sure to factor this into your itinerary planning and maybe include a short detour to your hotel/hostel.
Hakodate Bay Area
Getting to Hakodate Bay Area
The Bay Area is easily accessible either on foot from Hakodate Station or just a tram ride to Jiujigai.
If budgeting is not an issue (it shouldn’t be as the fare is around 210 yen), why not give their trams a try? A common question I think for most tourist unfamiliar with trams is how to actually make payment. The trams in Hakodate are simple to use. If you have taken a tram in Hong Kong before, the trams here operate in a similar way: you board at the back and pay at the front when alighting. Be sure to take a ticket when boarding as this will determine the fare payable. The machine is located at the entrance at the back.

The ticket will have a number printed on it corresponding to the stop you boarded at. There is a screen at the front of the tram. The screen will constantly refresh to show the price of your ticket (find the stop number printed on your ticket). If you are travelling by tram quite a bit (i.e. more than 3 rides in day), consider getting a day pass for better value.


Shopping at Hakodate Bay Area
The Bay Area is where the old brick warehouses are located in Hakodate. The area has now been converted into a shopping district offering tax free shopping if you purchase above 5,400 yen. Have a look around and see whether anything catches your fancy. We ended up buying gifts (food snacks to distribute) for our colleagues.


Where to eat at Hakodate Bay Area
If you are hungry, the Bay Area offers a number of eateries to choose from.
While there, we tried a secret place stashed away in a convenience store that offers cheap barbecue skewers.


Sushi
We also went to a sushi rotating belt restaurant where we decided to splurge with plates of Hakodate specialities (plates with 3 sushis of expensive cuts of seafood that average around 600 to 700 yen a plate).


Drinks
We finished our dinner at Hakodate Beer. I couldn’t resist going in to give their beers a taste. I went with the Alt and the Ale. While I did not know what an Alt is, it tasted similar to their ales. Pretty good ales comparable to those I tried while in England.


Motomachi and Mount Hakodate
From the Bay area, both Motomachi and Mount Hakodate are within easy reach. We didn’t manage to do Mount Hakodate due to bad weather. It had rained the entire day while we were in Onuma Park and also continued to rain during the evening. Coupled with the low temperatures, Mount Hakodate was covered in a ring of fog. While I attempted to drag my girlfriend to the ropeway station from the Bay Area, I too gave up as we approached the ropeway station. The fog was so bad that I actually lost eye contact with the cable cars heading up the ropeway. The fog had completely engulfed the cable cars after a certain point. As visibility was bad, we had to call it off.
Note to self: If you have the chance to do such weather dependent attractions, maybe consider squeezing them in as early in your itinerary as possible and not leave it to your last night in Hakodate.
While there, consider making a reservation with 阿さ利本店 that apparently serves very good Sukiyaki. While I had planned for a super early dinner at 5.30pm, it was apparently not early enough as the place was fully booked.
FAQ – Onuma Park
Is it possible to do Onuma Park as a side trip while on route to Sappro/Noboribetsu/Hakodate?
Yes. It is possible to do Onuma Park as a side trip. Each station offers coin lockers where you can deposit your luggage for a fee. I don’t remember this exactly but Onuma Park station may have a separate manned luggage office as well.
Do you require a full day of sightseeing for Onuma Park?
For most, the answer is no. You can incorporate Onuma Park as part of a day’s itinerary. You don’t have to allocate a full day for this. First, the park is only 30 minutes from Hakodate and feels like just another attraction to visit. You don’t have to waste time travelling out. Second, the park is surprisingly small and you can cover the trails within 2 hours.
Of course, if you prefer to go for a sightseeing cruise or a bicycle ride, that will extend your stay in Onuma Park.
What are the ticket prices for Onuma Park?
Free. Absolutely Free.
Postscript: I hope you enjoyed this post. I apologise for the length but I thought it would be appreciated if I gave you a more detailed itinerary/account of my trip to Onuma Park and also Hakodate. Please like if you found this post meaningful in anyway and also remember to follow to help support this blog.
6 thoughts on “1 Day Hakodate-Onuma Park Itinerary (What to see, do and eat while in Hakodate, Hokkaido)”
Comments are closed.
Hallo I think the admin of this site is in fact working hard for his website, since here every stuff is quality based information. gracias